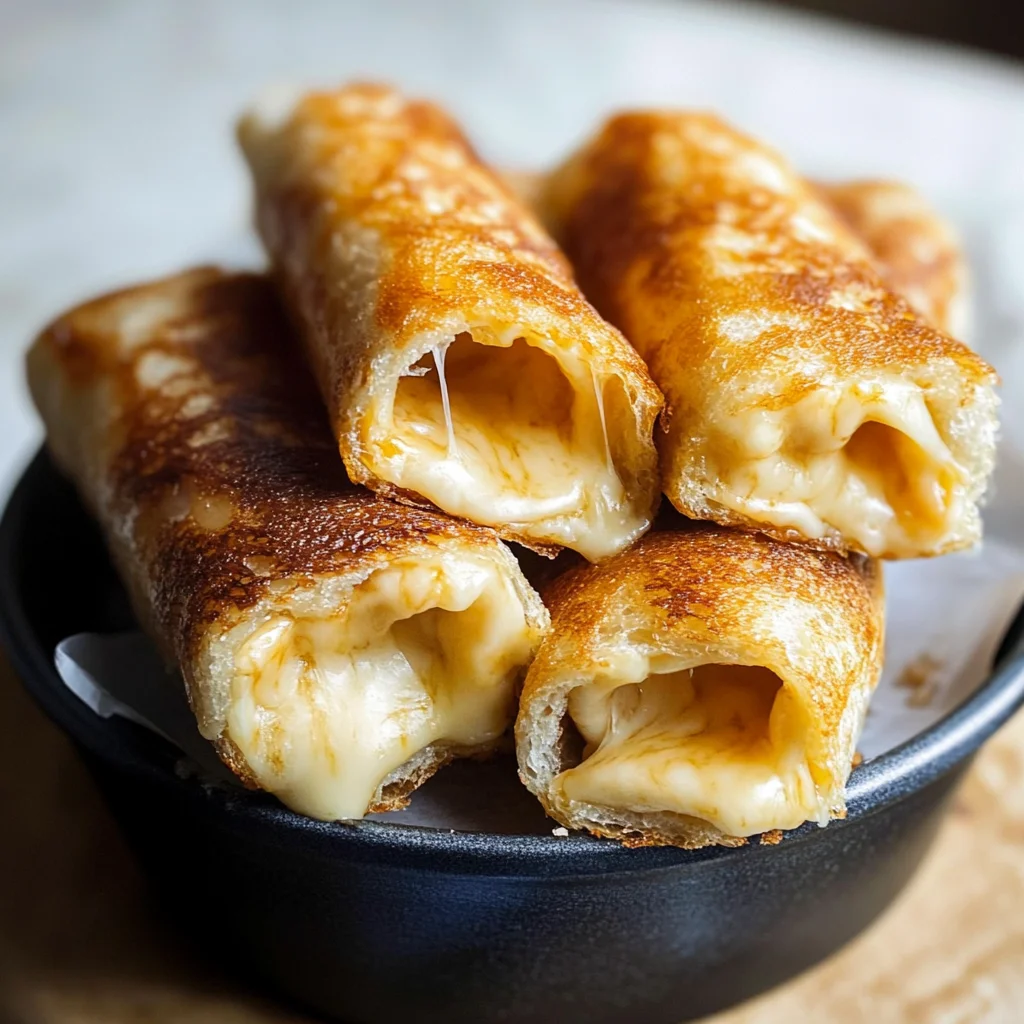
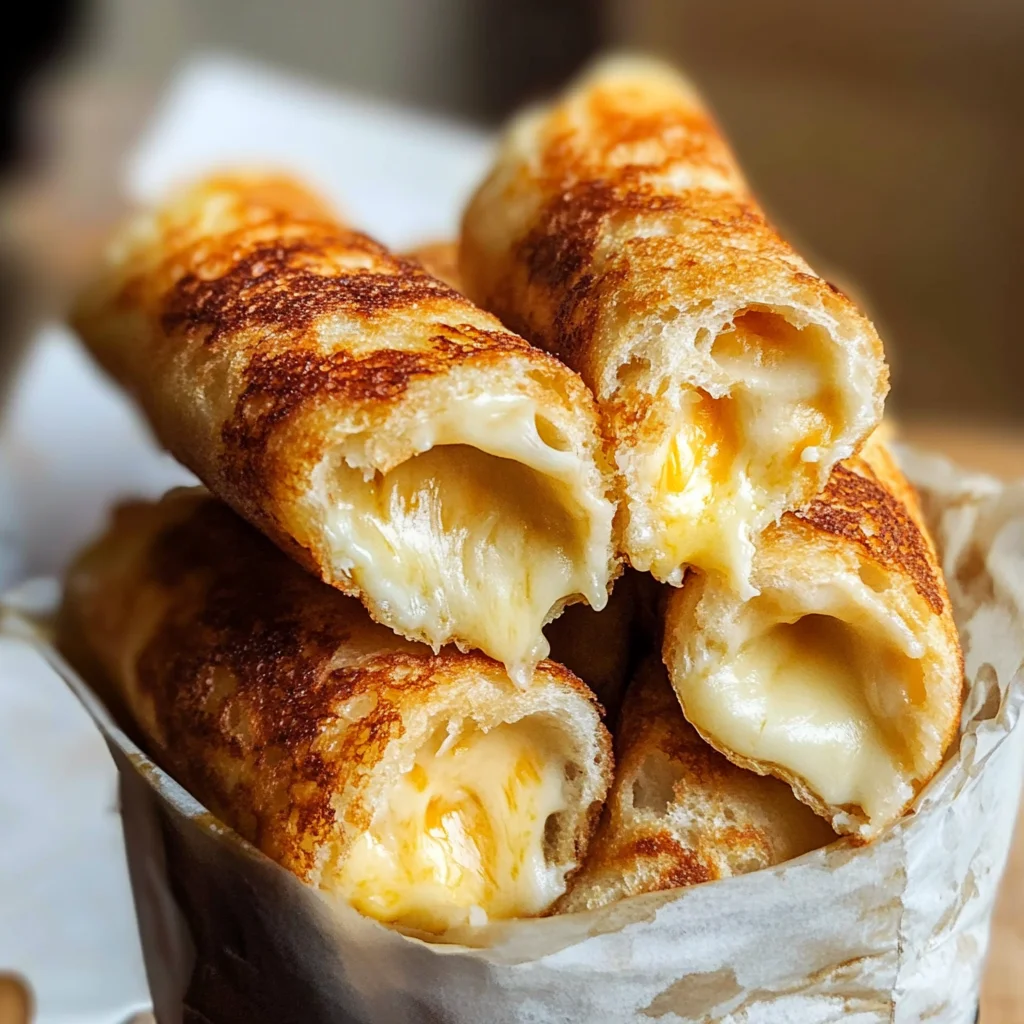
These Grilled Cheese Roll Ups are a delightful twist on a classic favorite, perfect for any occasion. Whether you’re hosting a casual lunch or looking for an easy snack, these cheesy rolls make a fun and tasty treat. The combination of crispy bread and gooey cheese is hard to resist, making this recipe a go-to for both kids and adults alike.
Why You’ll Love This Recipe
- Quick to Prepare: With just 30 minutes from start to finish, you can enjoy these delicious roll ups in no time.
- Cheesy Goodness: Each bite is filled with melted cheddar cheese that oozes out, offering a rich flavor experience.
- Fun for All Ages: Kids love the hands-on aspect of rolling up their own sandwiches, making it a great family activity.
- Versatile Snack: Serve them as an appetizer, main dish, or even at parties; they fit in anywhere!
- Customizable: Feel free to add your favorite ingredients like ham or veggies to make them even more exciting.
Tools and Preparation
Before diving into the deliciousness of Grilled Cheese Roll Ups, gather your tools and prepare your workspace. Having everything ready will streamline the cooking process.
Essential Tools and Equipment
- Rolling pin
- Sharp knife
- Frying pan
- Tongs
- Measuring cups
Importance of Each Tool
- Rolling pin: Essential for flattening the bread perfectly without tearing it, ensuring easy rolling.
- Frying pan: A non-stick pan helps achieve that golden-brown exterior while keeping the cheese from sticking.
- Tongs: Perfect for flipping the roll ups safely without damaging their shape.
Ingredients
These Grilled Cheese Roll Ups are super easy, totally cheesy and darn-right delicious!
For the Roll Ups
- 8 thick slices of Soft White Bread (see notes)
- 1.5 cups / 150g finely grated Cheddar
- 2 tbsp Butter (melted or as needed)
How to Make Grilled Cheese Roll Ups
Step 1: Prepare the Bread
- One by one, slice the crusts off each slice of bread.
- Use a rolling pin to flatten each slice evenly.
- Add a pinch of cheese to each slice, leaving a small strip at one end to brush with butter.
Step 2: Roll Up the Bread
- Tightly but carefully roll up each slice from the cheese end toward the bare edge.
- Brush the bare edge with butter before sealing it shut.
- Place each roll seam-side-down and brush all over with melted butter.
Step 3: Fry Until Golden
- Heat your frying pan over low-medium heat without any oil.
- Add the roll ups seam-side-down and fry until they turn golden brown.
- Use tongs to frequently turn them until they are golden all over and the cheese starts leaking out.
- Depending on your pan size, you may need to cook in two batches.
Enjoy these delectable Grilled Cheese Roll Ups as a snack or part of your meal!
How to Serve Grilled Cheese Roll Ups
Grilled Cheese Roll Ups are wonderfully versatile and can be served in numerous ways. Whether you’re looking for a quick lunch or a fun party snack, these roll ups can be paired with various dips and sides.
With Dipping Sauces
- Marinara Sauce: The classic tomato sauce adds a zesty flavor that pairs perfectly with cheesy goodness.
- Ranch Dressing: A creamy ranch dip brings a tangy twist to each bite.
- Honey Mustard: For those who enjoy a little sweetness, honey mustard is a delightful option.
As a Snack
- With Veggies: Serve your roll ups alongside fresh carrot and celery sticks for a crunchy contrast.
- Cheese Platter: Pair them with various cheeses for a cheese lover’s dream snack.
- Fruit Skewers: Fresh fruits like grapes or strawberries add a refreshing touch to your meal.
For Kids’ Lunches
- Packed in Lunchboxes: These roll ups are easy to pack and make for an exciting lunch item for children.
- Mini Sandwiches: Cut them into smaller pieces for bite-sized snacks that kids will love.
How to Perfect Grilled Cheese Roll Ups
To achieve the best results with your Grilled Cheese Roll Ups, follow these helpful tips.
- Use Fresh Bread: Fresh bread rolls out easier and yields better texture when frying.
- Don’t Overfill with Cheese: Too much cheese can cause the roll ups to burst during cooking. A pinch is enough!
- Keep Heat Low: Cooking on low-medium heat allows the cheese to melt without burning the bread.
- Brush Generously with Butter: Butter enhances flavor and helps create that golden, crispy exterior.
- Serve Immediately: These roll ups taste best when hot and fresh from the pan.
Best Side Dishes for Grilled Cheese Roll Ups
Pairing your Grilled Cheese Roll Ups with the right side dishes can elevate your meal experience. Here are some great options.
- Tomato Soup: A classic pairing that complements the cheesy flavors beautifully.
- Salad Greens: A light salad adds freshness and balances the richness of the roll ups.
- Pickles: Tangy pickles provide a crunch that contrasts nicely with the soft cheese rolls.
- Sweet Potato Fries: Crispy fries add an enjoyable crunch and sweetness to your plate.
- Potato Chips: Crunchy chips make for an easy, satisfying side that everyone loves.
- Coleslaw: Creamy coleslaw offers a refreshing taste that works well with grilled cheese flavors.
Common Mistakes to Avoid
Making Grilled Cheese Roll Ups can be easy, but avoiding common mistakes will ensure they turn out perfectly every time.
- Skipping the crust removal: Leaving the crusts on can make rolling difficult. Always slice them off for a smoother roll.
- Overstuffing with cheese: Too much cheese can cause leaks and mess. Use just a pinch per slice for the best results.
- Not flattening the bread enough: If the bread isn’t flattened, it won’t roll properly. Use a rolling pin to get an even thickness.
- Using cold butter: Cold butter won’t spread well and may not seal the rolls. Melt it before brushing for better adhesion.
- Cooking at too high heat: This can burn the outside while leaving cheese unmelted. Keep the heat low-medium for even cooking.
Storage & Reheating Instructions
Refrigerator Storage
- Store in an airtight container for up to 2 days.
- Place parchment paper between layers to prevent sticking.
Freezing Grilled Cheese Roll Ups
- Wrap each roll up tightly in plastic wrap or foil.
- Freeze for up to 3 months for optimal freshness.
Reheating Grilled Cheese Roll Ups
- Oven: Preheat to 350°F (175°C) and bake for about 10-15 minutes until heated through.
- Microwave: Heat on medium power for 30-60 seconds, but this may make them soggy.
- Stovetop: Heat in a dry skillet over low heat until warmed, turning occasionally.
Frequently Asked Questions
Here are some common questions about making Grilled Cheese Roll Ups.
What type of bread works best for Grilled Cheese Roll Ups?
Soft white bread is ideal because it rolls easily and holds the cheese well. You can also experiment with whole wheat or sourdough.
Can I customize my Grilled Cheese Roll Ups?
Absolutely! Feel free to add ingredients like cooked bacon, ham, or vegetables to enhance flavors and nutrition.
How do I prevent my Grilled Cheese Roll Ups from leaking cheese?
Make sure you don’t overfill with cheese and properly seal the ends with butter before frying.
What are some great dipping sauces for Grilled Cheese Roll Ups?
Try marinara sauce, ranch dressing, or even a spicy aioli for a delicious twist!
Final Thoughts
These Grilled Cheese Roll Ups are not only simple to prepare but also incredibly versatile. You can customize them with various ingredients to suit your taste preferences. Whether enjoyed as a lunch option or snack, they are sure to delight anyone who tries them!
Grilled Cheese Roll Ups

Grilled Cheese Roll Ups are a fun and delightful twist on the classic grilled cheese sandwich, perfect for any occasion. Whether you’re preparing a quick snack or serving them at a party, these crispy, cheesy bites are sure to please both kids and adults alike. With melted cheddar enveloped in soft, golden bread, every bite is an irresistible treat! Quick to prepare in just 30 minutes, they allow for endless customization with your favorite fillings like ham or veggies. Serve them alongside tasty dips such as marinara or ranch for a complete snacking experience.
- Prep Time: 10 minutes
- Cook Time: 20 minutes
- Total Time: 30 minutes
- Yield: Serves 4 (2 roll ups per serving) 1x
- Category: Snack
- Method: Frying
- Cuisine: American
Ingredients
- 8 thick slices of soft white bread
- 1.5 cups finely grated cheddar cheese
- 2 tbsp melted butter
Instructions
- Trim the crusts off each slice of bread and flatten with a rolling pin.
- Place a small amount of cheese on each slice, leaving one edge bare.
- Roll tightly from the cheese end to the bare edge, sealing with butter.
- Heat a non-stick frying pan over low-medium heat and cook roll ups seam-side down until golden brown on all sides and cheese is melted.
Nutrition
- Serving Size: 2 roll ups (60g)
- Calories: 240
- Sugar: 1g
- Sodium: 550mg
- Fat: 14g
- Saturated Fat: 8g
- Unsaturated Fat: 4g
- Trans Fat: 0g
- Carbohydrates: 23g
- Fiber: 1g
- Protein: 9g
- Cholesterol: 30mg
Keywords: Use fresh bread for better texture. Avoid overfilling to prevent leaks during cooking. Keep the heat low for even melting.