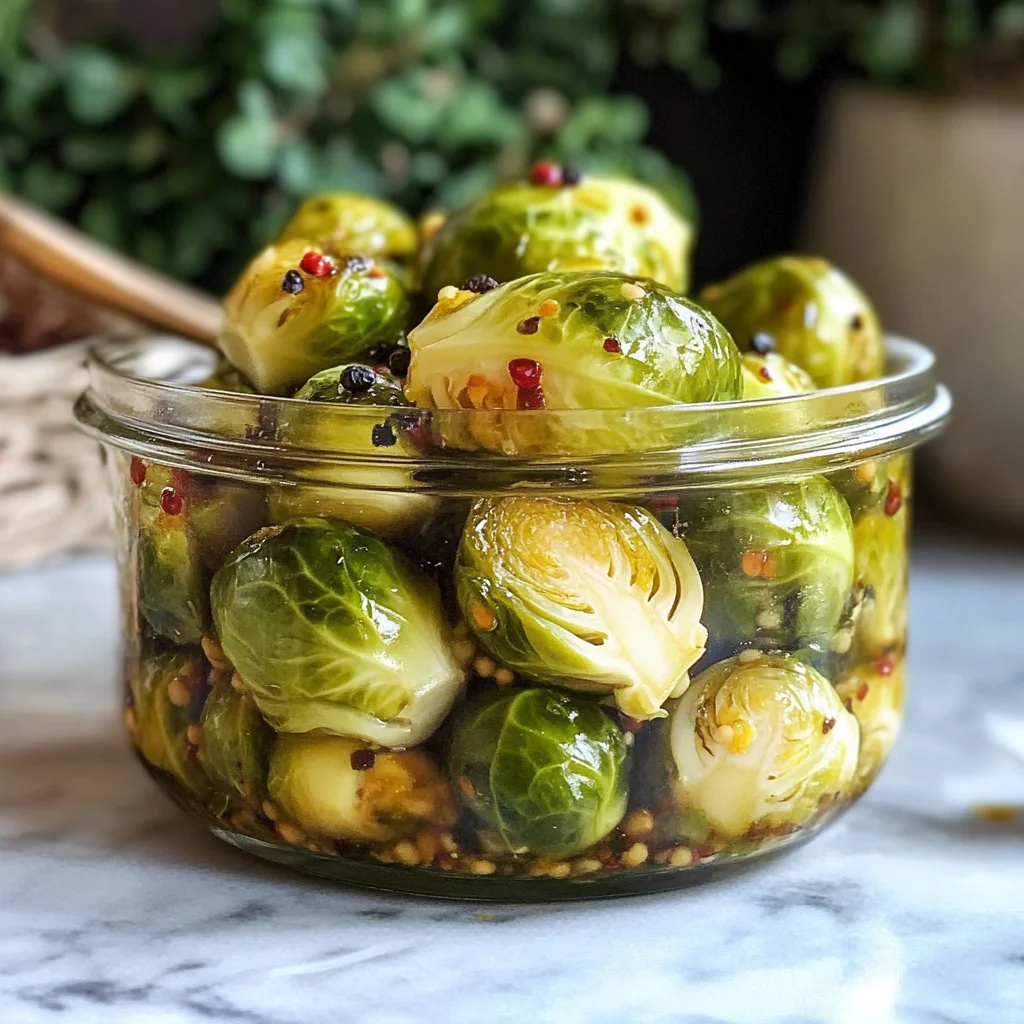
Pickled Brussels sprouts are a delightful way to enjoy this nutritious vegetable year-round. These tangy, crunchy bites add a zesty flair to salads, sandwiches, or even as a snack on their own. Their vibrant flavor and unique crunch make them perfect for gatherings, picnics, or simply brightening up your meals at home. Plus, pickling is a simple preservation method that ensures you can savor the taste of fresh Brussels sprouts long after their season ends.
Why You’ll Love This Recipe
- Easy to Make: This recipe is straightforward, allowing even beginners to achieve delicious results.
- Flavorful: The combination of garlic, peppercorns, and red pepper flakes creates a bold taste that elevates any dish.
- Versatile: Use these pickled Brussels sprouts in salads, on charcuterie boards, or as a stand-alone snack.
- Long-Lasting: Properly sealed jars can last up to 18 months in your pantry, making them perfect for meal prep.
- Healthy Snack Option: Low in calories and packed with nutrients, they’re a guilt-free addition to your diet.
Tools and Preparation
Before diving into the recipe for Pickled Brussels Sprouts, make sure you have all the necessary tools at hand. Having the right equipment will streamline your process and help you enjoy the pickling experience.
Essential Tools and Equipment
- Water bath canner
- Canning jars
- Lids and bands
- Slotted spoon
- Large pot for blanching
Importance of Each Tool
- Water bath canner: Essential for safely preserving your pickles by creating the right heat environment.
- Canning jars: These hold your brussels sprouts securely while they pickle and maintain freshness.
- Slotted spoon: Ideal for removing blanched sprouts without transferring excess water into jars.
Ingredients
Pickled brussels sprouts are a delicious way to preserve brussels sprouts in season.
- 3 lbs Brussels Sprouts
- 5 cups Vinegar at 5% acidity
- 2 cups Water
- 1/4 cup pickling and canning salt
- 6 to 12 cloves garlic (1 to 2 per jar)
- 6 tsp black peppercorns (1 per jar)
- 6 to 12 tsp red pepper flakes (1 to 2 per jar)
How to Make Pickled Brussels Sprouts
Step 1: Prepare Your Equipment
If canning, prepare a water bath canner, jars, lids, and bands before beginning. The canner should be preheated for hot pack at around 180 degrees F.
Step 2: Clean the Brussels Sprouts
Wash the Brussels sprouts thoroughly. Trim the stem ends and remove any outer leaves. Choose small, tight heads; cut larger ones in half.
Step 3: Blanch the Sprouts
Bring a pot of water to a boil. Blanch the sprouts for about 4 minutes. Remove them with a slotted spoon and pack into jars while leaving a half-inch headspace. Discard the cooking water.
Step 4: Add Dry Spices
Evenly distribute dry spices into each jar but do not add vinegar, water, or salt yet.
Step 5: Prepare the Brine
In a separate pot, mix vinegar, water, and salt. Bring this mixture to a hard boil while stirring until the salt dissolves.
Step 6: Fill Jars with Brine
Pour the boiling brine over the brussels sprouts in each jar while maintaining half-inch headspace. De-bubble jars as needed and cap them with two-part lids.
Step 7: Process Jars (If Canning)
Process in a water bath canner for about 10 minutes; adjust processing time according to altitude if necessary.
Step 8: Cool Down
Remove jars from the canner and let them cool on a towel on your counter. After about 12-24 hours, check seals; store any unsealed jars in the refrigerator for immediate use.
Step 9: Patience is Key
For best flavor development, wait at least one week before enjoying your pickled Brussels sprouts. This allows time for proper pickling and flavor infusion.
How to Serve Pickled Brussels Sprouts
Pickled Brussels sprouts are a versatile addition to many meals. Their tangy flavor and crunchy texture make them an excellent side or garnish.
As a Snack
- Enjoy them straight from the jar for a quick, healthy snack.
- Pair with cheese and crackers for a delightful appetizer platter.
In Salads
- Toss sliced pickled Brussels sprouts into your favorite salads for a burst of flavor.
- Use them as a topping on grain bowls for added crunch.
With Sandwiches
- Add pickled Brussels sprouts to sandwiches or wraps for an extra zing.
- They pair wonderfully with meats like turkey or roast beef.
On Charcuterie Boards
- Include pickled Brussels sprouts on a charcuterie board alongside meats, cheeses, and olives.
- Their bright color adds visual appeal to your spread.
As a Side Dish
- Serve alongside grilled meats or fish for a refreshing contrast.
- They can also be served warm, sautéed lightly in olive oil with garlic.
How to Perfect Pickled Brussels Sprouts
To achieve the best flavor and texture in your pickled Brussels sprouts, follow these tips.
- Choose fresh sprouts: Look for small, tight heads that are vibrant green.
- Use quality vinegar: Opt for vinegar with at least 5% acidity for safe preservation.
- Adjust spices: Feel free to customize the spice levels according to your taste preferences.
- Wait before eating: Allow at least one week for flavors to meld properly before tasting.
- Check seals: If canning, ensure jars are sealed properly to maintain freshness.
Best Side Dishes for Pickled Brussels Sprouts
Pairing side dishes with pickled Brussels sprouts can enhance your meal experience. Here are some great options that complement their tangy flavor.
- Grilled Chicken: Juicy grilled chicken pairs well with the acidity of pickled sprouts.
- Roasted Potatoes: The earthiness of roasted potatoes balances the tartness perfectly.
- Quinoa Salad: A light quinoa salad with herbs and lemon zest complements their crunch.
- Baked Salmon: The richness of baked salmon is enhanced by the sharpness of pickled vegetables.
- Coleslaw: A creamy coleslaw provides a contrast in texture and flavor that works beautifully.
- Macaroni and Cheese: The creaminess of mac and cheese is nicely offset by the tangy brussels.
Common Mistakes to Avoid
When making pickled Brussels sprouts, it’s easy to make a few common errors. Here are some pitfalls to steer clear of.
- Ignoring freshness: Always select fresh, tight Brussels sprouts. Wilted or damaged sprouts will not pickle well and can affect the final taste.
- Skipping the blanching step: Blanching helps retain color and texture. Skipping this step can lead to mushy sprouts.
- Not measuring ingredients accurately: Using incorrect ratios of vinegar, water, and salt can affect flavor. Always measure carefully for the best results.
- Overpacking jars: Leaving insufficient headspace can cause overflow during processing. Ensure you maintain at least 1/2 inch headspace for safe sealing.
- Rushing the pickling process: For the best flavor, allow at least a week for the sprouts to pickle before tasting. Patience is key!
Storage & Reheating Instructions
Refrigerator Storage
- Store in airtight jars in the refrigerator.
- Properly sealed jars can last up to 12 months in cold storage.
Freezing Pickled Brussels Sprouts
- Freezing is not recommended for pickled Brussels sprouts as it alters their texture.
- Instead, enjoy them fresh or store in the fridge.
Reheating Pickled Brussels Sprouts
- Oven: Preheat to 350°F (175°C) and warm in a covered dish for about 10 minutes.
- Microwave: Heat on medium power in short bursts until warmed through, stirring occasionally.
- Stovetop: Gently heat over low flame in a skillet, stirring frequently until hot.
Frequently Asked Questions
Here are answers to some common questions about pickled Brussels sprouts.
How long should I wait before eating Pickled Brussels Sprouts?
It’s best to wait at least one week after pickling for optimal flavor development.
Can I adjust spice levels when making Pickled Brussels Sprouts?
Absolutely! You can customize the amount of red pepper flakes and garlic according to your taste preferences.
Do Pickled Brussels Sprouts need refrigeration?
Yes, once opened, they should be stored in the refrigerator to maintain quality.
What are some serving suggestions for Pickled Brussels Sprouts?
These pickles make an excellent side dish or topping for salads and sandwiches.
Final Thoughts
Pickled Brussels sprouts are a delightful way to enjoy this nutritious vegetable year-round. Their tangy flavor makes them versatile enough to complement various dishes. Don’t hesitate to customize your brine with different spices or herbs for a unique twist!
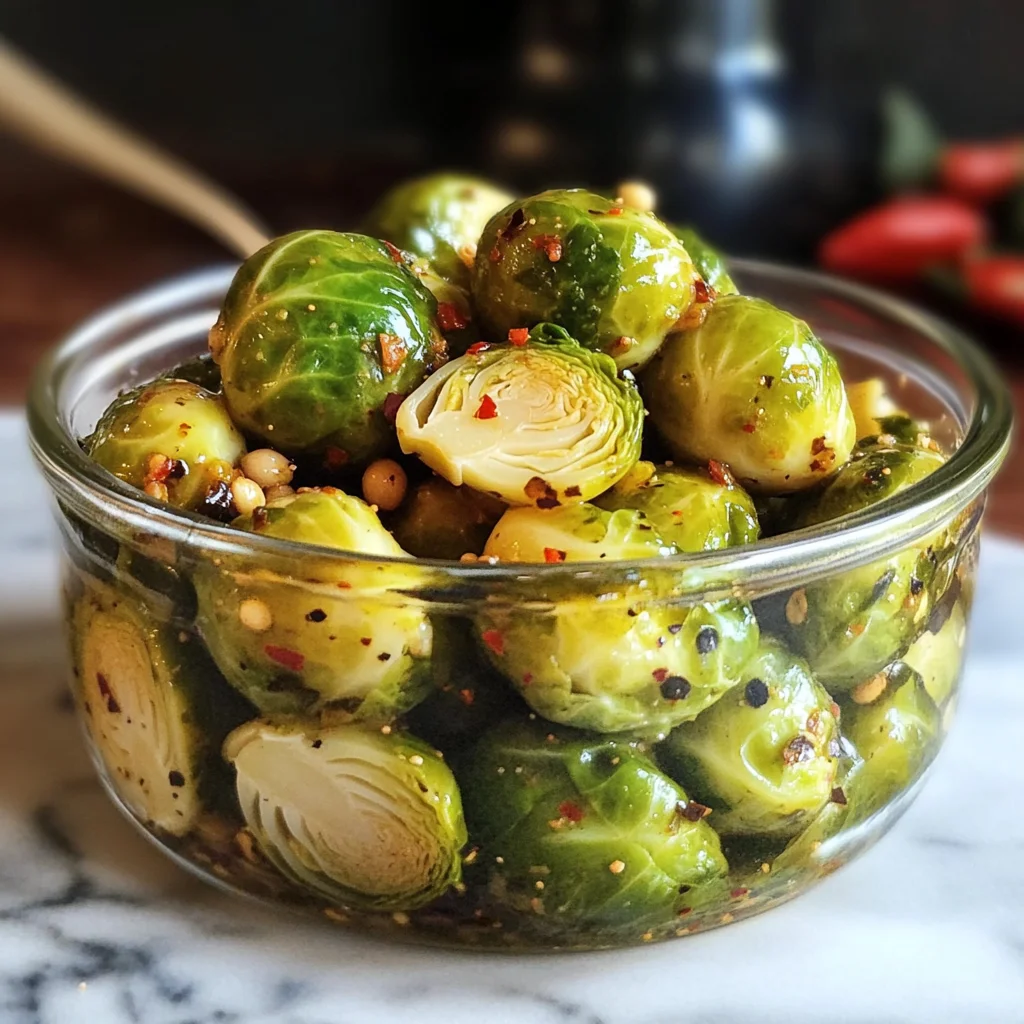
Perfectly Tangy Pickled Brussels Sprouts

Pickled Brussels sprouts are a tangy and crunchy delight that can elevate your meals year-round. This easy recipe combines the fresh taste of Brussels sprouts with a zesty brine, creating a versatile condiment perfect for salads, sandwiches, or as a stand-alone snack. With their vibrant flavor and satisfying crunch, these pickles are sure to impress at picnics and gatherings while being a healthy addition to your diet. Making pickled Brussels sprouts is not only simple but also an enjoyable way to preserve this nutritious vegetable, ensuring you can savor their deliciousness long after the season ends.
- Prep Time: 20 minutes
- Cook Time: 30 minutes
- Total Time: 50 minutes
- Yield: Approximately 6 servings 1x
- Category: Pickle
- Method: Canning
- Cuisine: American
Ingredients
- 3 lbs Brussels Sprouts
- 5 cups vinegar (5% acidity)
- 2 cups water
- 1/4 cup pickling salt
- 6–12 cloves garlic
- 6 tsp black peppercorns
- 6–12 tsp red pepper flakes
Instructions
- Prepare your water bath canner and jars; preheat canner to 180°F.
- Wash and trim Brussels sprouts; cut larger ones in half.
- Blanch the sprouts in boiling water for 4 minutes, then pack into jars leaving a half-inch headspace.
- Add garlic, peppercorns, and red pepper flakes to each jar.
- In a separate pot, boil vinegar, water, and salt until dissolved.
- Pour hot brine over the packed sprouts, ensuring proper headspace.
- Process in the water bath for 10 minutes; cool on a towel after removing jars.
- Wait one week before enjoying for optimal flavor.
Nutrition
- Serving Size: 1/2 cup (120g)
- Calories: 50
- Sugar: 2g
- Sodium: 950mg
- Fat: 0g
- Saturated Fat: 0g
- Unsaturated Fat: 0g
- Trans Fat: 0g
- Carbohydrates: 11g
- Fiber: 4g
- Protein: 3g
- Cholesterol: 0mg
Keywords: Customize spice levels by adjusting red pepper flakes according to your preference. Ensure you use fresh Brussels sprouts for the best texture and taste.